Showing posts with label frugality. Show all posts

Friday, 25 April 2014

Float of toys


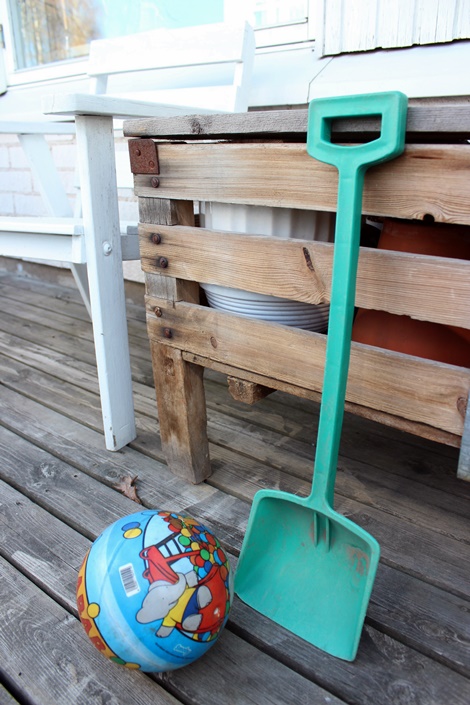
On our backyard is a small creek or maybe I would call it a ditch. It collects rain waters from the streets, that means the water is not very clean, and that is why a ditch sounds more appropriate. The ditch runs underground and comes on surface next to a children's playground. All sorts of toys float on the ditch once in a while. When I see toys floating on it I usually take out my rake and rescue the toys from the water. Previously I've thrown the toys to trash or taken to the playground of our apartment building. But now I'm keeping the toys for Likka. We already have a ball and a shovel for her.


(Of course there is also trash on the ditch, when I see them I pick those up too and take those to our trash bins)

Wednesday, 22 January 2014

Baby vest

There is a particular reason I've been making so many cardigans for Likka. We finally got winter here and eventhough the heating in our home works great and the temperature inside is about the same as it is on summer, the floors do get cold. I myself need to wear wool socks all the time, I think it's a bit drafty on the floor level. And do you know where Likka spends most of her time when she is awake? On that cold floor of course. Well there is a rug or a blanket underneath her but still I think the floor is a bit cold place to be.


That is why I have made her those cardigans and now a vest. I had some material left from the red wool cardigan my mother gave to me. From the left over of the cardigan sleeves I made a wool vest for Likka. This time I was able to make the neck bit better, it's just the right size. The vest can be opened from the other shoulder (like Likka demonstrates here) so it's easy to put on.


The vest looked a bit dull without any decorations so I added the flowers on the waist. The stalks are this zigzag ribbon and you know the ribbons that are attached to shirt neck on stores so that the shirts do not drop off from the hanger? I always remove those ribbons and since it's impossible for me to throw away crafts material I save those ribbons. Now I finally used two for the flower buds.

Monday, 20 January 2014

Wool cardigan converted to a wool overall

(Argh, the colours in this picture are all wrong!)

My mom gave me an old red wool cardigan to use as a crafts material. It was in perfectly good condition, just the button holes were torn.

Now we finally got winter here, from plus five it suddenly dropped to minus fifteen Celcius and we actually got some snow! That is amazing! The snow came really late this winter. But this means that Likka needs something really warm to wear. Likka has a few wool overalls, but those are still too big, so I quickly (well... it was supposed too be quick) made her another overall from the old wool cardigan. It's not so common to cut knits and sew them, but it really isn't much different than sewing regular fabric. You just need to make sure every stich row from the knit is sewed close so they don't unravel, but using a short stich on the sewing machine should do the trick.


Like I said it was supposed to be quick thing to do, but I wanted to sew on top of the neck rib knit with a double pointed needle I had bought some time ago. With that needle I need to have a second thread running from the top of the machine and there is a hole for somesort of spool holder. I just don't have that holder so I've used a random stick on the place. Now I took one very large needle and placed that on the hole, but the needle was too slim and it dropped right into the sewing machine. Outch. I was too afraid the needle is somewhere inbetween the moving parts of the machine so I did not dare to sew anymore and I had to open up the whole machine to remove the needle. Well the good thing is that I did clean the insides of the machine from all the lint while it was open.

Then I took another stick to use as a spool holder and started sewing. But it seems that the double pointed needle did not do a good job on the seam, it did not work at all. I just got long thread runs on the sides, I'm not really sure what was wrong, maybe the fabric was too thick, I don't know. Since that did not work out I decided to use regular zig zag on the seam.
Then I noticed I had made the neck too large. Whole thing looked like an overall for dogs, it looked hilarious. It would have been perfect for a small bulldog. :)

So I took the rib knit apart from the neck and shortened it and then reattached it. I think the neck is still too large but I don't want to take it apart again.


Monday, 25 November 2013

Soft book from scraps


As an attempt to one day use up my scrap fabric supply I made a soft book for Likka. I must emphasize the word attempt, because soft book clearly isn't one of the most efficient or a fast way to use the scraps, especially if each of the pages on the soft book contains some hand embroidered details. But the idea is what matters, right?


I have still some of the train fabric left and decided to use the locomotive image of the fabric on one of the pages. I wanted the book to have somesort of theme and because of the locomotive I chose a motor vehicle theme. Between the cover pages is felt from a wool blanket, the middle pages have this thick and hard fabric, so the pages feel a bit different. Also one of the pages has some cellophane in between them so it crinkles.


On the corners I sewed triangles to avoid the filling getting off from its position. The spine has some car ribbon which you can see best on the last picture. I really like the book, although on some pages I did a bit of sloppy work and some of the machine embroidery looks a bit bad, but I kind of like those self made looking details here.

Wednesday, 30 October 2013

Dress out of a shirt

My biceps are apparently getting huge, because one day I lifted a thing from the ground and as I was moving my arms up the other sleeve tore close from the bicep. Ups.


Since the shirt was now unusable I made a dress out of it for Likka. The button-front is now the back and I added a pocket to the front of the dress. And edged everything with bias tape. I tried to size it so that it would fit Likka when she is able to sit, because dresses on someone who cannot do anything else than lay do not look too good in my opinion.


Monday, 28 October 2013

I ♥ baby pants

Boohoo, the "I ♥ NY" pajama shirt I bought as a souvenir from New York got so worn I was embarrased to use it. It had giant holes under the arms. I liked the shirt and I used it quite a lot since the trip to New York in 2007... Christ! was it already 2007!? Gee, now I'm actually wondering how could it have hold up for six years. Wow.


Well ofcourse I couldn't just throw the shirt away, but I made another pair of baby pants from it for Likka. The pants wont fit her for long, I wonder what I will do from the "I ♥ NY" baby pants then...


Monday, 23 September 2013

Potato growing bags, part two


I'm really super duper late with this post. This really isn't the right time anymore to start growing potato. Remember the potato growing bags that looked like trash cans? I made them because I got white plastic from work. Before I had received the plastic I had thought of making potato growing bags from tarpaulin, but changed my plans because of the free plastic, which then turned out to be an ugly idea.

After making three ugly trash can bags I decided to go with my original idea. My original idea was inspired by these hideously priced Bacsac growing bags or these bit more modestly priced Zigg Zagg ones. The Bacsacs do look nice at least the colourful ones, but Hello! I won't buy them at that price. The Zigg Zagg ones I could had bought but the colours are all wrong.


I wanted my potato bags to be white and so I bought a white tarpaulin with less that ten euro. Then sewed bags from that. I made two sizes, one with diameter and hight of about 40 cm and other with 30 cm. For both I cut a square, folded that in half and sewed the long egde together. Then turned the top over the bottom half, so that the seam was now left inside the two surfaces. After that I tucked in the sides of the tube and sewed the bottom close.


Then I sewed on a handle, so the bag is easier to move if needed. For the bigger one I sewed the handle to go all the way through the bottom, because I want it to support the bottom a bit. But I admit that it was quite difficult to sew, so on the smaller one I just sewed two handles on the sides. Since I made only two bags from the tarpaulin so I'm still left with a HUGE pile of it.


So I did not put potato into the bags, instead in the smaller one I planted some fall flowers and the bigger one I'm using to store some clothes of the kid. Next summer I can use the bags as I originally intended. The bag is not maybe the prettiest one for flowers. The point in using bags as containers is that those can be collapsed later when container gardening season is finished.


Please ignore the fact that I put way too little soil into the bag and the plants are now too deep to look their best.

One thing I would like to mention. Do not use cotton thread if you plan to grow something in this type of bag, it will compost, it's better to use polyester thread, that should last longer. 

Wednesday, 8 May 2013

Socktopus


I've gone officially baby crafts crazy. I admit. My head is buzzing with ideas of crafts to do for the kid. And the kid we are speaking about is -4 months old. But I cannot stop my brain, it's like it's gone on warp drive.

On the same time I feel very proud of my creativity and especially of the fact that all my craft ideas so far have not required bought material. Most things I have done, like the Socktopus, are made of stuff we already happened to have. This one I made from old T-shirts and socks. Hence the name Socktopus. And the wadding is from an old pillow.


I narrowed the socks a bit with a serger so I could remove the bad looking areas from the heels of the socks. I sewed on one of the head parts the eyes and the mouth. Then I combined the pieces for the Socktopus head. I attached the pre wadded legs to the head and the bottom piece. I turned the right side out and filled it with wadding. 

I LOVE the Socktopus, it's so huggable, soft, cute and so useless. Maybe I'll keep it myself.


ps. Just realized that octo in the word octopus most likely means eight. Which makes me notice that I should have had eight sock legs for the Socktopus instead of six. In Finnish the octopus is freely translated as "ink fish", so I only noticed this while writing the post. But... who cares!

pps. The voting for the most amazing dollhouse project is open till Sunday the 12th of May.


(It is not necessary for you to vote me)

Wednesday, 1 May 2013

Beanie and a skimask

First of all 
Happy first of May!
In Finland we will be enjoying the labour day by not going to work and eating donuts and drinking sima.

This is the final post of the baby stuff I've made (so far). I could have posted about these things when I posted about the trousers and jumpsuits, because these things I'm about to show are made from the same material. I'm repeating myself but the fabric I used with these projects was old bit worn out clothes from me and mostly from A.

The baby beanie and the ski mask were the only patterns I took straight from the book Baby cool that I borrowed from the library. On the beanie I first stenciled a text that I liked and then sewed the beanie. The ski mask I made for a bit bigger child, but I'm surprised how big it turned out. It can almost fit me.


Also from the scraps of the same yellow T-shirt as the beanie I made a pair of small mittens. I hope the beanie and the mittens fit on the kid around the same time.

So these are the baby gear I've made so far. I know this will not be the last post about the crafts for the kid, but these are the things that are now finished.

So perhaps next post will be less childish, perhaps...

Monday, 29 April 2013

Hooded baby towels

We have huge amount of towels, I have tried to reduce their number by donating the not so nice ones and making rags of the really worn ones, but still we have too many. For the kid I made hooded towels from our own towels. I took three towels from the closet and cut from each of them a big square piece and one triangle. I first made the regular white one from a towel we have apparently stolen from a cruise ship (ups, sorry). It had the shipping company's logos on it and it was bit embarrassing to use. I cut off the logos and made the hooded towel from the rest. I used an bias tape on all the edges. I did want to use some other colour, but the brown was the only one I had enough of.


The white was a bit of a practice towel but the next ones I made funnier. In a book Strömsö there is a towel made for much bigger child, it's a orange towel with pointy ears and a white tail, the towel is like a fox. So from that I got the idea of making other animal towels. First I chose to make a frog from a green towel we had. The green towel had a pair from a light blue towel and since I did not want to leave that without a match I wanted to use the blue towel as well. I had bit of trouble figuring what character to make from the blue one, but I chose to make a shark from it. I think the towels turned out super cute and fun. 


There could have been so many options on what characters or animals I could have made from different coloured towels. I was also thinking of making some kind of monster from a lilac towel, but how many hooded towels does a kid need!


Wednesday, 24 April 2013

Sewed clothes for the kid

So what should I start this runway of baby stuff with? I have so much to choose from. I have mainly made clothes for the kid. Couple months ago I saw a book in a book store called Baby cool, it's originally a Swedish book but it's translated at least to Finnish. Later I loaned the same book from the library. There were lots of neat projects for children made from old adult clothes. There were even many patterns included in the book, which I very poorly used but the book was so inspiring!

The minute I got the book home I started going through our rag pile of old clothes and was super inspired to start working on more and more sewing projects. The book was so appropriate for me since I did not want to get much new fabric or yarn, which often is more expensive than the ready made clothes. (Here you can see that I'm contradicting myself. Remember some earlier posts where I said I have bought some fabric? But so far I've used only the welt rib knit fabric I got from Marimekko sometime ago.)


From a thrift store I bought some baby clothes, like that dotty jumpsuit, and used those as patterns. Most of the old adult clothes we had were from the time when we purged A's closet and he does not dress in very girly colours so most of the clothes I made ended up quite boyish or unisex. Unisex was what I was after anyway.


When I made these clothes I really did not pay much attention to the quality of the sewing. I just did not feel like spending too much time on the details I just wanted things done. So in some clothes the zippers are badly attached and some seams are really not straight at all, for some reason I'm not at all bothered by it. The kid will wear those clothes only for a few weeks so details and putting time on these clothes is really not the priority (I'm aware some people will disagree, but this is my solution). Anyway... point of this was that the kid will have some clothes to use and the rag pile got a lot smaller.


My favourite item to make was trousers, so easy and so fast! The short jumpsuit on the other hand was really annoying with the neck and the buttons. The longer jumpsuits with the zippers were not as bad, but not as fun as the trousers. I really like the orange jumpsuit that to me reminds of a pumpkin, it's so funny. I happened to have a green zipper in the right length and used that with out thinking much, but I like the result. It's humorous. Also on one of the trousers I used the front of a shirt on the bum side, it also turned out quite funny.


Those were the trousers and jumpsuits I've sewed so far. All of these were done almost two months ago. By the way I redid the hanger specifically to take pictures of the clothes for you. I shortened our regular wooden hanger and painted it yellow.
Related Posts Plugin for WordPress, Blogger...