Showing posts with label i'm a giant. Show all posts

Thursday, 15 December 2011

Teahouse warming party

Welcome! Let me introduce you to the resident of the Teahouse, he's name is Totoro and he comes from Japan. Also one other guest has arrived too, Moomintroll from Finland came to a visit.


Totoro is a very famous actor, he has stared in the movie My Neigbor Totoro, named after him (that's how famous he is). Totoro had this Teahouse built where he could retreat from all the city fuss. So are you interested in a grand tour?

Here is the deck, I know you've seen it before. Totoro has planned to start a zen garden around the decking, but it's still in planning stage.


From three sides of the house the shoji screens open and on summer days those can be left open. Let's move inside then. We'll start the tour from the altar, it's a very sacred place, take note that it is not a table, nothing that does not belong there should be placed there. The image above is a painting of Daruma, the father of Zen.


Then on the left there is the built-in storage space, that has sliding doors. It has three shelves where for example the bedding can be stored.


Then we can move to the center of the house. The floor is covered by tatami mats in a very traditional Japanise style. There in the center is a small table and seat cushions.


As we are now in a teahouse, we also have some green tea and if you are hungry some sushi. The teapot and the cups were made from the same polymer clay as the roof, using instructions from MiniMaker. The sushi set is the only bought item in the Teahouse and it's from Etsy, but I can't find the seller anymore, it's name was 2plus1 MiniWorld. At the time I bought the sushi there was no actual mini sushi sold in Etsy, or then I was really blind, so the thing I bought is actually dim sum, but to me it looks like sushi and it's good enough.


Please enjoy your stay and feel right at home. You can even stay for the night. Moomintroll atleast is staying, he's had bit too much of sake allready.


~ ~ ~

This post is the final post for the I'm a Giant challenge by Emily Henderson. All my posts about the challenge can be found behing this link.


Wednesday, 14 December 2011

Invitation to the house warming party


~ ~ ~

This post belongs to the series of posts for the I'm a Giant challenge by Emily Henderson. All my posts about the challenge can be found behing this link.

Monday, 12 December 2011

Crux blanket in mini

I know all of you have probably seen the Crux blanket by Pia Wallén on every other interior design magazine. I love the blanket, but the price of it is ridiculous so I would never ever buy it for myself (especially when one could easily make one themselves on a weaving station in the worker's academy, *hint hint*).

Okey so I'm not going to make one in full size, at leats for now, but since it's such a lovely blanket I made two in miniature size for the teahouse. I had grey felt at home and used that as a base. Then I used some white paint to make the crosses.


I cut out a stencil from a plastic document pocket. And then painted.


After the paint dryed I had myself two mini Crux blankets. Those came out so cute!


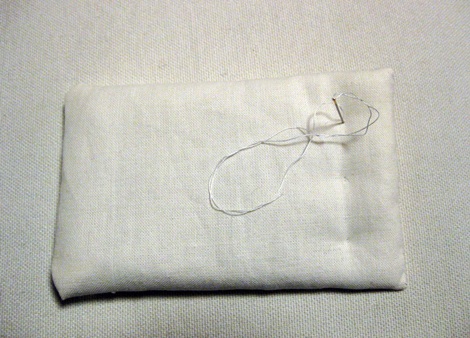
Now that I got the blankets ready, the bedding that I started to make some time ago are now fully done and just waiting for the first night guests for the teahouse.


~ ~ ~

This post belongs to the series of posts for the I'm a Giant challenge by Emily Henderson. All my posts about the challenge can be found behing this link.

Friday, 9 December 2011

Topping-out party

The building of the roof of the tearoom was getting very wearing, but then I got sudden help from Bob the Builder!


It was very nice of him to come to help me. Just think how many times I would have needed to climb those ladders with a pile of roof tiles if I would have been alone.


The tiles were waiting on the deck. First the straight tiles were laid on the laths using hot glue.


Then was the turn of the arched tiles, those were glued with super glue.


The last arched tiles needed to be formed a bit before baking so they would lay more flat and the arched tiles that came to the top egdes would sit nicer. Also it was possible to see inside to the arched tiles from the lower egde and I wanted to cover them up, so I made cones that I then pushed inside the first arhed tile.


Then suddenly the roof was all done.


Then we had a topping-out party with Bob, we had worked so hard. Bob brought some flowers and we had some wine on the deck to celebrate the finished roof.


~ ~ ~

This post belongs to the series of posts for the I'm a Giant challenge by Emily Henderson. All my posts about the challenge can be found behing this link.

Friday, 25 November 2011

At the roof tile factory

When I started my teahouse building I did not have any specific plan on how I'm going to make it and I certainly had not made any plans on paper or calculated how much materials I would need. I just went to the crafting store and bought some amount of wood and some other materials. I thought I wouldn't need much materials at all and the whole teahouse could be built in less than 40 euro. Well I was dumb as a boot.

I had allready visited to the crafting store twice after the initial shopping trip to stock up on the wood and on superglue. The third trip I took there was to get more modeling clay for making roof tiles. Here are the tools I used for making the roof tiles. Knife for cutting, ruler for measuring obviously, jar as a rolling pin and glass sheet as a workbase.


Originally I had bought two packages of FIMO modeling clay, I was certain that would be way enought, but I couldn't have been more wrong. Then I made the mistake of mixing two colours, black and brown, I wanted dark brown roof tiles.


While I was mixing the first batch I noticed the mixing was lot of work. It was lot more burdensome than I had thought. The colour was fine though at that point, but when the roof tiles hardened in the oven they turned allmost black. I had been to so much trouble and then the end result was almost black anyway. Now I had done the first batch and did not want to start over so I needed to make the following batches equal. Also I noticed that from two packages of modeling clay I was able to make one fourth of the roof. Only one fourth!


Well I had started making the tiles like that and I was not going to back out now. So mixed up the next three batches of the clay, cut the straight tiles and hardened them in the oven. This took several evenings. Then I made arched tiles to go in between the straight tiles, I used my roof tile cutter with great success.


I draw a form for the arched tile on paper and formed the tiles on top of it, so I could get the tiles somewhat uniform.


Then I baked the arched tiles too. And here is how my roof tile factory worked like for many many days and I don't think the plastic smell is ever going to leave from the oven. Stay tuned for the tiling of the roof maybe next week.


~ ~ ~

This post belongs to the series of posts for the I'm a Giant challenge by Emily Henderson. All my posts about the challenge can be found behing this link.

Monday, 21 November 2011

Furniture and bedding for the teahouse

Like all house builders I too get excited about the interior design before the house is actually even finished. Which means I have been creating furniture and designing the indoors more lately.

On the I'm a Giant challenge we were actually supposed to decorate a dollhouse and while I've been watching some telly I started to work on the furniture and bedding. So one evening I started to make futons (matresses) to the teahouse.


I know in Japan people most likely don't sleep in teahouses, but in my teahouse sleeping is approved. Then I ofcourse will aslo make pillows and and blankets. One cannot sleep without a pillow or a blanket.


For the tea seremony I made a low table. The tabletop is made of balsa and the legs are wood. I lightly painted it white.


And also to make the seating more comfortable I made seat cushions. It's from the same fabric I made my own pillow for the sofa.


According to Emily Henderson who's put up the challenge the big reveal of the finished house is December 15th. I have no idea what happens then, but I quess that is the day when I will post the final post about the tearoom and show you what it looks like with all the details.

Also the resident is moving in on the 15th and he will have a housewarming party and you are all welcome!

~ ~ ~

This post belongs to the series of posts for the I'm a Giant challenge by Emily Henderson. All my posts about the challenge can be found behing this link.

Wednesday, 16 November 2011

How to make a (cookie) cutter out of a can

I needed a cutter for the roof tiles, I have to make so many of them and it would be a pain to measure and cut them all separetely. I created the cutter from thin aluminium that I got out of a beer can. We did not have any empty cans at home and since we don't drink soda or pop or whatever you call them I had to empty one beer can... on monday. The sacrifices one has to make for crafts, Oh!


So to make a cutter, I cut the can open, I use regular scissors to do that. If you have only a very nice pair of scissors that are beautifully sharpened, then maybe use some other tool for the cutting since the aluminium might damage or atleast blunt the scissors.


Cut out a strip from the can and bend one edge a bit over to make the edge less sharp, this edge will be the top edge of the cutter, so you don't hurt your hands. 

I made a very small cutter so I made it from only a one layer of can aluminium. If you require something more sturdy, cut out a wider piece and then fold and press it in half lenghtwise, that edge will be the cutting side. Then bend the two edges on the other edge over to make the edge where your hands will press the cutter. 


Then I form the cutter, the hardest thing is to keep the corners perpendicular to the egde, so the cutter will not get crooked.


I cut off the excess material and glue the flaps together, trying to make sure the edges are again on the same level. I've used two composite epoxy resin, not sure if that is the best glue to use if you are really making cookie cutters. Although I doubt the glue is going to leave any residues on the cookies once it's hardened. I read someplace that you could even staple the flaps together. I haven't tried that but it might work. So once the glue had dried I had myself a very nice roof tile cutter.

 
~ ~ ~

This post belongs to the series of posts for the I'm a Giant challenge by Emily Henderson. All my posts about the challenge can be found behing this link.

Monday, 7 November 2011

Roof structures

I have allready told you that I've had some difficulties with the roof on the I'm a giant challenge. And I'm still having difficulties with the roof, but atleast the roof structures are now done. Phew. What was most difficult was to find the perfect glue that would hold the wood pieces together.

I started out by building the general structure out of site and afterwards moved it on place.


At first I used hot glue, 'cos I thought it would be easy to use because it hardens so fast. Well, it wasn't any good, it did not attach well and it was too bendy. When I tried to attach the middle supports, I managed to break the whole thing. Argh!


Then I tried super glue and that just sucked right into the wood and no glue was left on the surface to actually work as glue. Also tried two composite epoxy resin but that was just too difficult. Then I had nothing else to use but the regular wood glue. On the end it was the best eventhough it dried so slowly that I had attach one or two pieces at a time and then take a 15 to 30 min break.

When I had the main structure done I lifted it on the teahouse and glued it on.


The traditional shrines and teahouses have a curved eaves and I wanted my tearoom to have similar type of roof. After lot of thinking and some consultation from A, I figured out how to make the eaves. I glued two pieces of balsa wood together in a 90 degrees angle, so I got both of the directions on the final product equally strong. Balsa is wood where the strength of the wood is very different depending on the angle of the fibers in the wood.


I cut out the forms of the curve of the eaves with crafting knife and glued them on the roof structure.


There you see the basic form. Then I attached the roof laths where the roof tiles will be placed on.


So, there you have it. A finished roof structure. Now left to do are gazillion roof tiles and to put them on and then the actual decoration of the tearoom. Easy peasy.

~ ~ ~

This post belongs to the series of posts for the I'm a Giant challenge by Emily Henderson. All my posts about the challenge can be found behing this link.

Friday, 21 October 2011

Shoji screens


The roof building is still in progress, it will require lot of work, a lot. While I waited for the glue to dry on the roof structures I started to make the shoji screens or doors for the tearoom. I'm writing this really late and the words are not really flowing right now, so this post will just have million pictures to explaine what I've done.


All screens are made from thin mulberry paper and some sticks I bought from the craft store. Then I also used matches.


I had glued long strips of wood to the floor, next I slid the door in the groove and then glued another strip on the top to keep the door in place.


Now the doors can be closed.


And the doors can be opened.


Also the doors can be opened in a different way.


Here is the another side door, closed and opened.


I built the screens similar on both sides, so now it looks pretty even from the inside.


Off to bed now.

~ ~ ~

This post belongs to the series of posts for the I'm a Giant challenge by Emily Henderson. All my posts about the challenge can be found behing this link.
Related Posts Plugin for WordPress, Blogger...