Showing posts with label office. Show all posts

Friday, 7 February 2014

Separated side curtains

I sewed curtains for Likka's room, which she does not yet have. Perhaps not the visest thing to do. Before she gets her own room I might change my mind about the style of the room or we might even move (well, that is very unlikely).

We visited Alvar Aalto house in Helsinki over a year ago. There in the office quarters of Alvar Aalto house was a curtain between two rooms from Siena fabric. I fell in love with that fabric right there, but it took me quite a while to decide where to use that fabric.


Lately I have been thinking about Likka's future room, I like to ponder on future projects, which of some I never even start, but this one we will sure start although not very soon. At least so far our sleeping arrangement feels good and I'm in no hurry moving Likka to her own room or more accurately me and A will move out of Likka's room.


But I already have an image in my head of Likka's future room and the curtains made of Siena fabric are included in that image. So since I had time and inspiration I bought the fabric and sewed the curtains. Now since we already have curtains in the room that will be Likka's room and I like those curtains there for now I hung the other curtain to the office where we had no curtains and the other to the kitchen were we had a curtain, but a really dull one. I hope I don't change my mind later about the curtains, the fabric was not cheap.


PS. If you have been very perceptive you have already seen the curtain here

Wednesday, 27 February 2013

Paper shredding


After each New Year I go through my papers from the two years before, which this time meant papers from 2011. I usually keep all bills, tax papers, bank statements, insurance things and so on when I get them, but yearly I go through them and throw out papers that are no longer needed. I don't have a shredder so I rip the papers into smallish slices. It really does not take long and I get such a pleasure from the ripping. It's so pleasing to get rid of paper. When all are ripped I mix them up a bit before I take them to the paper recycling bin. I doubt anyone is intrested in the papers, but incase they would be I'm making it just bit more difficult for them to check out my personal papers. 

Friday, 30 November 2012

Snow and lights


It is snowing as a I write this post. Snow is the ultimate reminder that it is now winter. And since it's winter it is appropriate to put up some decorational lights and light the candles.


I've usually hung a string of lights to the livingroom, but since there is already the himmeli, glowing orbs and other winter decorations I thought of adding some ambiance to the office. I was planning to hang the string of lights better, but I placed it on top of the floating shelves while I was pondering how to attach it to the wall, but then I kind of liked the lights just randomly placed there on top of the shelves. So I left it as it was.


I must mention that I have spent a lot of time in the office after the renovation there was finished. I love the office. I'm really pleased with it, I'm really happy I can do my crafts there. Also the livingroom is easier keep neat when my craft stuff is not on the dining table but in the office. So redoing the office was a huge success.

Monday, 20 August 2012

The office tour

Hello and welcome to the office tour! The office is finally finished, at least I'm calling it finished even though there were a few things on the to do list that I am still left to do. Hover over the next three pictures to see the before picture. (Thank you Christina for the tutorial about the animation)


I couldn't be happier about the new office space, we have so much open floor area and I have plenty of work surface for taking photos, sewing, crafting and working with the computer. I now have the table higher than it was before so I can also stand while working.


I'm still so in love with my wall cubbies. I placed in them stuff I use most often. One of the clear boxes holds glues and other different tools. I have my sewing toolbox on the top cubbie and there is also some yarn. On display I have my tapes, so I remember to use them.

The door side of the room has A's shelf and the guest bed that I bought and attached the Sesam wall bed mechanism to. Now it takes so little space, I love it. I am still planning to build a closet to hide the bed, but I'm not hurrying that, I will build it when I have some time and motivation for it.


I was also planning to get a new office chair for A, but we have not find any that both looked good and was functional. Many nice looking chairs lacked some ergonical issues like armrests and the adjustments were poor. I might make a slip cover for the chair later.

The other side is mostly mine. The narrow shelf part on the right holds more of A's stuff. But most of the shelf holds my things. When I planned what I should keep in my shelf I desided to give some area to the unfinished crafts projects. So I added one wooden box and two baskets on the bottom of the shelf on the left. Now I'm happy to say those are mostly empty, but usually I have many craft projects going on at the same time and previously I had no place where to keep those so they just sat on all horizontal surfaces which did not look good.


Lastly, this is my view to the garden from my work space. I love being able to see outside while creating.


Hope you enjoyed the tour. I certainly did. 

Friday, 10 August 2012

Cubbies on the wall


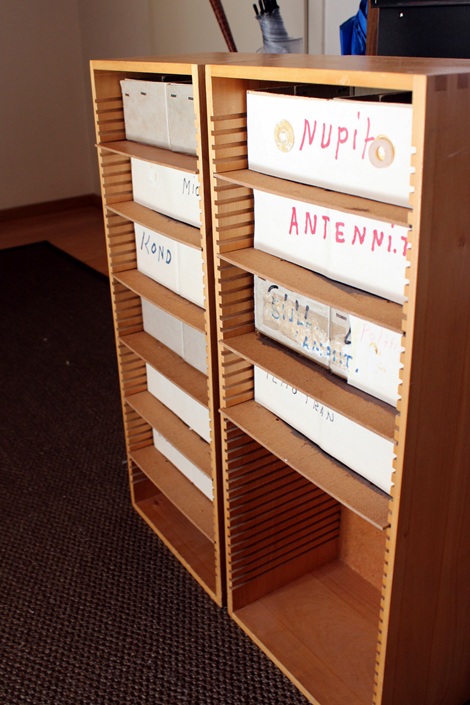
Remember those cubbies I showed long long time ago? Perhaps not. Anyway these were part of the heritage we got some time ago. Since then the cubbies have been waiting for the painting in the office to be finished. That was a long wait.

I took out the shelves with cardboard boxes from the cubbies. The boxes were glued really hard on the shelves and  first tryed to rip the boxes off, but the shelf boards broke and I ended up throwing all the shelves and the boxes to trash. In the end I did not even need the shelves, since I desided to turn the cubbies on their side.

I drilled holes to back plate of the cubbies and asked A to hold the first cubbie on level against the wall. After I marked the places of the holes I drilled the wall and attached the first cubbie on the wall with srews. To level the second shelf with the first one I used books to hold the second cubbie on the wall while I marked the places to drill.


I think the cubbies are super nice and handy too. Here you also see my work surface. We had a table in the office before but I didn't like it's wooden colour, so I bought a new table top from Ikea and attached the old legs to it.


Now I have been filling the shelf (that you can just see in the right there) and the cubbies with stuff. It's unbeliavable that the office is almost finished!

Monday, 6 August 2012

All shelves are painted

 
All the shelves are now painted! Finally! 
It took way longer than I thought. I assumed it will take me about one week to finish each side of the room to  paint the walls and the shelves. But it took more like one month to finish each side of the room. Huh, but now they are ready. How amazing is that!

For these shelves I needed to buy quite a lot of paint. I used branch varnish on places where I was afraid the resin would show through the white paint. I think I could have gotten a lot of shelves from lets say Ikea for just the price of the paints. But these shelves we had are expensive brand and they are quite versatile and good quality so it was no point getting rid of those. And new Ikea particle board furniture won't last for decades like these shelves have already done. These are the paints I used.

I painted twice with the primer and one time with the top paint. I had to paint the edges two times, the paint did not stick as well on the edges as on the bigger surfaces. The bigger surfaces were sanded by the belt grinder and the edges by hand and I think there was still more old varnish left on the edges so the paint did not stick as well.


What I did horrible wrong with the painting was the scheduling. I had not realized it takes so long for the top layer to dry, which was three days. The paint will feel dry after few hours, but there was this sticky feeling to it and that was only gone after the three days. I also made the painting more tiring for me because I did it actually in 5 sections
  1. sanding and painting the first shelf from the other wall
  2. sanding and painting the new shelves I bought used
  3. painting the vertical support piece that I used as a drying stand
  4. sanding and painting the second shelf from the second wall
  5. painting the vertical support piece that I used as a drying stand

This makes me realize why it took so long in the end to finish all of the shelf. But it would have been quite difficult to empty all the shelves at the same go, but I atleast should have bought the new (used) shelves earlier so I could have combined painting them and the first shelf at the same time. Well... live and learn.


Ah, but how I do love them! Maybe I love the shelves even more because of all the work the painting included. I'm so happy.

Monday, 23 July 2012

Walls are all painted!


Hip hip hurraa! All the walls are painted now. Yippee! Those are so beautiful, so white, so lovely. This wall needed three layers of paint as did the other wall. I still need to wipe that wooden valance, since I used it as a support while standing on a stool painting the top parts of the wall and now the valance is covered in finger prints.


The rest of the room looks like this. Still some painting to do with the shelf and a lot of organizing to be done for all the stuff.


Wednesday, 4 July 2012

Yarn storage container


In addition of painting the office walls and the bookcases I've also done some organizing of my craft stuff. I'm on Aby's workshop for craft spaces and even though I had a pretty clear image of what I wanted to accomplish in the office I still wanted to take that workshop and I'm glad I did. I think I have been more motivated to work with the office redo with the support from the group than I would have been without it.

Most people in the workshop are not doing as extensive redo for their creative space but are decluttering and organizing their craft stuff. So of course I was inspired by them and started thinking of my yarn storage. I looked and looked for a perfect size container with dividers for my craft cabinet, but I couldn't find one. Then I figured I could make one myself.

I was going to write a full tutorial how to make the following type of container, but as always it didn't really go as I planned. But here is anyway somesort of report how I made it.


The materials I used for the container was a big piece of leftover cardboard (and actually I needed even a bit more than that) and I also used two old sheets. I wanted my container to be square so I cut from the cardboard one bottom piece, six long pieces and six short pieces. The long pieces are equal lenght as the sides of the bottom plate and one small piece is a one third of the side of the bottom plate.


Then I cut fabric according to the sizes of the cardboard pieces. I was first planning to attach the dividers on the bottom and sides of the container, so at first I sewed three pieces formed like in the picture under.


After that I realized that it was going to be too difficult to attach the dividers to the bottom and the side and just ripped some fabric out and made the container it self separate. Here you see before I ripped the excess material off.


On this stage I had finished the dividers and I had almost finished the container too. In that stage the bottom cardboard piece needs to be placed inside the fabric layers before the last side was attached.


The last seams I sewed by hand, I wanted the seam to look neat and with the serger I could have only sewn it from the outside and that would have been also very tricky with all the big cardboard pieces.


There it is all finished. You'll notice I also added a handle, there is one also on the back side. I sewed the handle first to the fabric only and then later added the black cross through all the layers, the cardboard and all.

The container turned out quite sturdy and very roomy. It fit all my yarn so easily that I could have double the amount I have now. And the container fits into my craft cabinet perfectly. I love it!

Monday, 2 July 2012

Déjà vu

I have a feeling I've done this before, removing wallpaper I mean. Somehow it feels different though, like it was a different wall or something before. I could be imagining though.


Or maybe that actually happened.

Friday, 29 June 2012

One shelf is up!

Hihhey! The shelf for the painted side of the room is now dry and assembled! Yay! It's white! So pretty.


I must say the assembly was not pretty. I placed the top, bottom and middle shelf on the vertical support pieces, which was freakingly difficult because I didn't have anyone to help me. A is in Shanghai for two weeks and I did not want to wait putting the shelf up.

I had the shelf lying on the floor and then tried to measure that the shelf would be straight before I screwed the cross support on the back. I lost my nerve when I made the measurements, the measuring tape just did not stay on place and my arm didn't reach anywhere and I got really mad. Also I made the mistake of starting to put the shelf together while I was hungry. I guess my blod sugar was too low because I started coursing to the shelf. Now I've eaten and the shelf is also up and not crooked so I feel lot better.


That table top that sticks out from the shelf will be A's work surface. A tends to pile stuff on horizontal surfaces so I thought to prevent that he should not have as much space for it as before. And we will get separate work areas, so his stuff wont slide onto mine.

The shelf under the work surface is for collecting the cord mess, I plan to tuck all the excess cords there and maybe also the external hard drives. I hope the shelf does not hit his knees. The bottom shelf on the right most likely needs to be moved away since I think it will be on the way of A's feet and also the computer tower needs to be placed somewhere.


But it's up, Wohoo! Next I need to move some stuff on the shelf to make room for the other side of the room so I can paint that side and the shelf there.

Wednesday, 20 June 2012

Shelf is drying


Thank you Alana for suggesting to use a roller when painting the shelf parts. The painting has been fast and smooth. But what hasn't been fast is the drying. The finishing paint feels dry after couple hours but the jar says that the paint is fully hardened after three days and before that nothing should press the paint. So I'm waiting and I've never been good at that.


As you know I still have the other shelf from the other wall to disassemble and paint, but I also bought more of that same shelf. Like I didn't have enough to paint before!

Friday, 15 June 2012

Painting and drying stand

Usually I paint either in the bathroom or outside, but the shelf painting takes up so much room that it does not fit in the bathroom. Also painting the shelf outdoors has not been an option since even though it has been mostly sunny we've got some rain showers almost daily. This meant that I had to create a painting and drying area in the office.

I also wanted to speed up the painting process so that I could be able to paint all the sides of the shelves on the same go. The furniture paint also dries up slowly so I needed a place where I can leave the shelf parts to dry without having to move them all the time.

So I created a painting and a drying stand. First I placed an A-ladder and a stool on some way from each other. Then I covered everything with plastic and also placed a sheet underneath to keep some weight on the plastic and to catch any drippings. Then I placed the vertical support piece from the shelf on the stool and the ladder where I can then slide the shelves to dry.


The painting stand I made using couple pieces of wood and four big nails. I attached the stand on the office table with bar clamps. I also covered the table with the plastic and a sheet.


Here you can see the stand in detail. Now I can flip the shelf on the nails and paint the other side and then place it to dry.

Related Posts Plugin for WordPress, Blogger...