Monday 31 October 2011

Ready for Holidays - 28 day challenge

Aby at the Simplify 101 has started a 28 days challenge to get homes Holiday ready. It is about a month before it's Thanksgiving, which is not celebrated in Finland, but I thought I could still participate. Decluttering has never done harm for any home.

It's allready the fifth day of the challenge on monday. I jumped on board a bit late, but the tasks are not overwhelming at all so I was able to complete them all in one go.

The day three on the challenge is consentrating on surface cleaning. I did some decluttering on two of the trouble spots, as Aby calls them. The trouble spots in our home are the dining table, top of the entry drawer and the surfaces in the office / guest room.

Decluttered the top of the entry drawer, most things were wainting to be taken to the storage room outdoors.


Then decluttered also the dining table. I left there on the table the materials and tools I need for the I'm a giant challenge, I will be needing those later.


On the fourth day of the challenge Aby says to focus on the ceiling. I could not found any cobwebs, but check this out.


Beautifull, isn't it? That was the air outvent on the kitchen ceiling. I had noticed it beeing that dirty, but hadn't done anything to it. Now I opened it and vacuumed it thoroughly.


Then I wiped it clean with dishwashing liquid. I couldn't get it completely clean, but clean enough, would have needed to srcub it with something, but no one will notice it from the floor level.


We have four of these vents around the house and I did clean them all, but the kitchen vent was the dirtyest.

Friday 28 October 2011

Runway for souvenir

Scb at her blog Where there are Meadowlarks started a talk about souvenirs and while I commented on her blog post, I started to go through in my head all the souvenirs I have. When I noticed that I have so many souvenirs that I cannot keep a list of them only in my head I started to write them down.

Also at Simplify 101 Aby just talked about souvenirs and how she often has a practical end use for them. I tend to get something practical from my trips too. Ofcourse I also get things that are just pretty or fun. Some of my souvenirs have nothing that would indicate where they are from. I've bought things that look like they could be from anywhere, but since I remember where I've got them, then they are souvenirs.

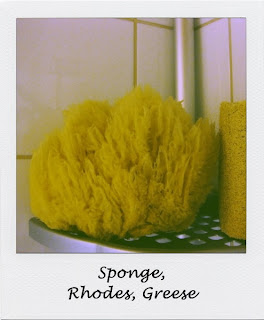
After I had written down all the souvenirs I could remember, I took my list and then started to walk around the house to find even more of them. While I was circling in the house I thought I could take pictures of all of them. And I thought that maybe you would want to see those too. Wouldn't that be fun? So here they are, room by room.

Livingroom


Kitchen


Entry


Toilet and bathroom


Office / Guest room


Bedroom


So those were MY souvenirs, but we have even more, I did not include souvenirs A, my friends or family has given me or souvenirs A has brought from his trips. And I'm sure I have forgotten some.

Wasn't that fun? Now I need to continue to build the roof to my miniature teahouse. I chose a laborious roof model, but it's going to be so worth it. It's very important to the get the roof on, it's soon winter and all.

Wednesday 26 October 2011

Jewellery for work


I was at a jewellery course on tuesday. It was organized by a colleaque and she had booked a meeting room for this purpose. It was not work course, it was just held at the office.


On the course we had a teacher Tarja Rytkönen, to teach us the basics and to help us put together the jewellery.


In the company I work for we have to use ID badges all the time, so I desided to make two necklaces where I could hang the ID badge. One bright coloured necklace and one less flashy one. In the above pictures you can see I've hung the ID bagde on the other one. 


Many others made these ID bagde necklaces too, it was not my own idea or anything. I had seen people with these type of necklaces before and I understood they have made them in the previous courses that have been held almost every six months or so.

I also made these funky earings.


Cannot wait to get to work to show off these necklaces and earings. So fun!

Monday 24 October 2011

The easiest way to dust plants

Dusty plants don't look very nice and the plants don't feel well when they are covered in dust. The easiest way to dust the plants is to shower them, that is, if the plants are small enought to move.


I have all my plants in pots with holes on the bottom which are then placed inside nicer looking pots that do not have drainage holes. I remove the pots from the covering pots and then I'm free to rince the plants clean. If you cannot remove the plant from a pot that has no drainage holes then you have to be really carefull not to overwater the plants, either use water very sparingly or try to rince only the foliage.

I clean up the covering pots while the plants are drying out a bit. It's amazing how much dirt can be found from the bottom of the pots.


I try to dust my plants every six months and they do flourish after the shower. While the plants drip dry, it is the perfect time to deep clean the window sills.


You should notice though that not all plants can be rinsed like this, for example Saitpaulia that has hairy leaves, does not like to have water on the leaves. I have no idea how that type of plant has ever survived in the wild, but that is what all the plant guides say.
Related Posts Plugin for WordPress, Blogger...