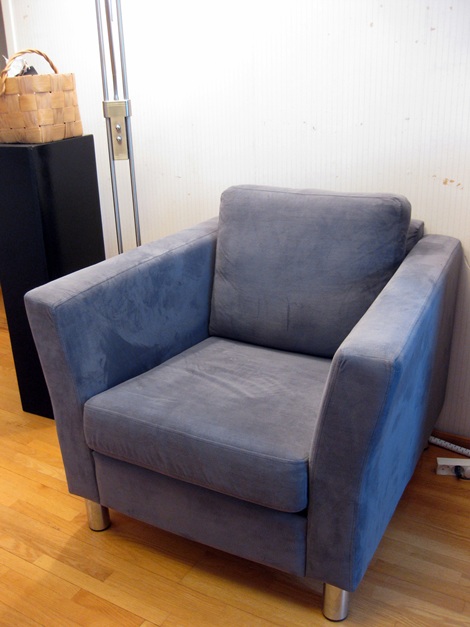
Making a slip cover for the office armchair has been on my to-do list forever. The upholstery of the chair is originally gray although in some light it looks bit blue. The colour itself is not totally bad atleast when it looks gray, but the fabric creates lots of static electricity. Every time I get off the chair I get a static shock. I hate that.
I assumed that a cotton slip cover would fix the static electricity problem. I wasn't sure, but I also did want to change the colour of the chair to white. So I had to give it a try.
The chair is mostly very square in shape so I made only two patterns from places where I could not just cut out square pieces from the fabric.
Also the chair expands a bit on the armrest. After I had finished the slip cover for the main frame I realized that I cannot put it on because the lower part of the cover is smaller than the top part. So I had to add a zipper on the back.
My grandmom taught me the basics of sewing long time ago, I think I was around sewen when I started to sew with the sewing machine and after that I am self taught. But I've gotten sloppier over the years, faster but sloppier and to tell you the truth it does not matter. My grandmom taught me that most things should be tacked together before sewing, but I never do that I just pin. I've learned that in bigger and smaller projects there will always be mistakes, so I don't mind if there are one or ten. I don't actually know why I'm telling you this, maybe because if you look at the zipper closely, you'll notice that it's not well done. But it works and it's on the back of the chair so who cares.
Anyway I've learned a few tricks while teaching myself how the sew. In my opinion the best way to make a cover for a pillow with side pieces is first to sew a zipper on the middle of one of the sides, then attach the pieces to form a large circle. After that's done I pin the top and the bottom on the sides.
To remove the pillow inside the pinned cover I draw lines with a pen to mark where the pins are, then remove the pins from one side and remove the pillow. I don't use the zipper for removing the pillow since it's usually very difficult with all the pins.
Then I repin the egde and sew using the pins as a mark where to sew. Oh and what is very important is to leave the zipper a bit open. It's very difficult to open the zipper from the back side.
I didn't iron it so it's a bit wrinkled. Also ignore the wall, no painting is happening anytime soon. But want to hear the good news? It's not an electric chair anymore! The cotton cover helps. Yiihaa!


Looks awesome, great job! I'm sure no one notices the walls with such a lovely new chair!
ReplyDeleteUu.. thanks Meagan.
DeleteLovely! I am so glad it is not the electric chair anymore! It looks great from here. :) Congrats for getting it done.
ReplyDeleteThank you. Surprisingly making the cover was not that laborious, atleast compared to the making of the dining chair seat cushions.
DeleteLooks great! I wish I could sew like this. Still need much more practice..
ReplyDeletePractice makes perfect... :D
Delete